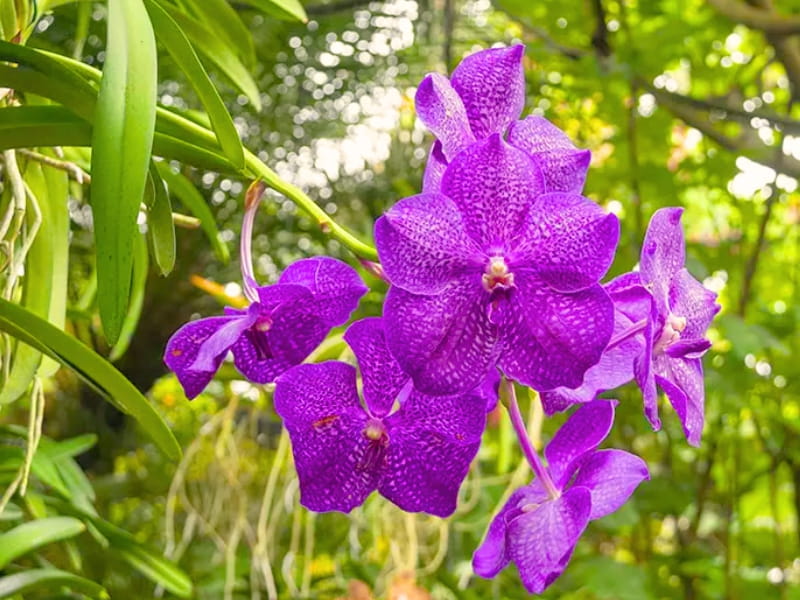
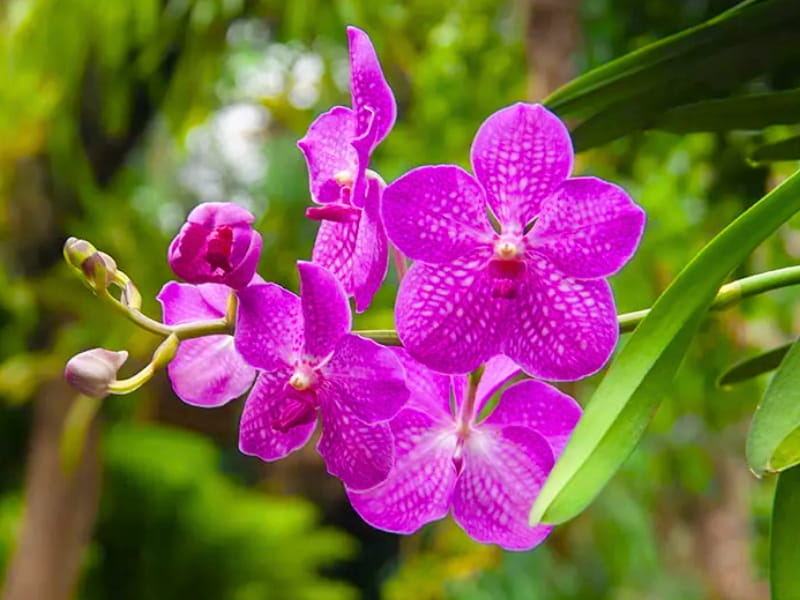
Vanda orchids, also commonly known as strap-leaf orchids or by their botanical name Vanda, are stunning epiphytic orchids renowned for their vibrant colors, large blooms, and often fragrant flowers. These tropical beauties, related to genera like Ascocentrum and Neofinetia, are prized for their relatively easy care when their specific needs are met.
At Gardencenterpoint.com, we understand the desire to cultivate these magnificent plants. We provide comprehensive resources to help you succeed, whether you are looking for Vanda orchid care tips, searching for specific varieties, or wanting to learn about propagation.
Understanding Vanda Orchid Natural Habitat
Before diving into specific care instructions, it’s crucial to understand the natural environment of Vanda orchids. This knowledge forms the foundation for replicating those conditions in your home or greenhouse.
| Common names | Vanda Orchid, Strap-leaf Orchid |
| Botanical name | Vanda (Genus) |
| Family | Orchidaceae |
| Subfamily | Epidendroideae |
| Tribe | Vandeae |
| Subtribe | Aeridinae |
| Origin | Tropical and subtropical Asia, Northern Australia |
| Life cycle | Perennial |
| Plant type | Primarily Epiphytic (some Lithophytic) |
| Hardiness zones | Generally 10-12 (USDA) |
| Sunlight | Bright, Indirect Light (Filtered) |
| Temperature (Day) | 75-85°F (24-29°C) optimal |
| Temperature (Night) | Above 60°F (15°C) |
| Humidity | High (60-80%) |
| Water | Moderate to High (depending on growing method) |
| Drainage | Excellent (essential) |
| Air Circulation | Essential (Good airflow required) |
| Spacing | Depends on size; allow for air circulation |
| Flowering period | Varies by species/hybrid; often multiple times per year |
| Height | Varies greatly (6 inches to several feet) |
| Growth rate | Moderate to Fast (during growing season) |
| Flower color | Wide range: blue, purple, pink, red, yellow, orange, white, brown, tessellated patterns |
| Flower size | Varies greatly (1 inch to 6+ inches) |
| Fragrance | Varies by species/hybrid; some are highly fragrant |
| Stem color | Green |
| Leaf color | Green (may have reddish tinge with high light) |
| Flower benefit | Long-lasting blooms, vibrant colors, diverse forms |
| Garden style | Tropical, Orchid Collection, Greenhouse, Indoor (with proper conditions) |
| Uses | Hanging baskets, mounted displays, potted (with specialized mix), specimen plants, cut flowers (some varieties) |
| Propagation | Keikis, top cuttings, (less commonly) division |
| Fertilizer | Balanced orchid fertilizer (diluted) |
| Pest and Diseases | Susceptible to root rot (with overwatering), fungal/bacterial diseases (with poor air circulation), mealybugs, scale, spider mites. |
- Origin: Vanda orchids are native to a wide range of tropical and subtropical regions across Asia, including India, Sri Lanka, the Philippines, Indonesia, New Guinea, and southern China, as well as northern Australia.
- Epiphytic Nature: Vandas are primarily epiphytes, meaning they grow on other plants (typically trees) rather than in the ground. Their thick, fleshy roots are adapted to cling to branches and absorb moisture and nutrients from the air and rain. Some species are lithophytic, growing on rocks.
- Climate Preferences: They thrive in warm, humid environments with bright, indirect light. They generally prefer daytime temperatures between 75°F and 85°F (24°C – 29°C) and nighttime temperatures that don’t drop below 60°F (15°C).
- Air Circulation: Constant, gentle air movement is essential for Vanda orchids. This helps prevent fungal and bacterial diseases, mimics their natural breezy habitat, and aids in the drying of their roots after watering.
Essential Vanda Orchid Care Requirements
This section provides a detailed breakdown of the key care requirements for Vanda orchids.
1. Light: The Key to Vibrant Blooms
- Intensity: Vanda orchids require bright, indirect light. Direct sunlight, especially during the hottest part of the day, can scorch their leaves.
- Ideal Exposure: An east-facing window with some morning sun is often ideal. South-facing windows can also work, but you’ll need to filter the light with a sheer curtain or shade cloth. West-facing windows can be too intense in the afternoon.
- Signs of Insufficient Light: Dark green leaves, lack of flowering, and weak growth are indicators that your Vanda orchid isn’t receiving enough light.
- Signs of Excessive Light: Yellowing leaves, sunburn spots (brown or black patches), and a reddish tinge to the leaves suggest too much light.
- Artificial Lighting: If natural light is insufficient, you can supplement with artificial grow lights. LED grow lights are a popular and energy-efficient option. Aim for 12-16 hours of light per day.
- Seasonal Adjustments: The amount of natural light will depend on the season. During winter, days get shorter which requires the grower to adjust lighting accordingly.

2. Watering: Mastering the Art of Hydration
- Frequency: Watering frequency depends on several factors, including temperature, humidity, air circulation, and the potting medium (or lack thereof). Vandas grown in baskets with exposed roots typically need watering more often than those in pots with some potting mix.
- General Guideline: As a general rule, water thoroughly when the roots turn silvery-white. When they are green, they are well-hydrated. In warmer months, this might mean daily watering, especially for basket-grown plants. In cooler months, you may be able to reduce watering to every few days or even once a week.
- Watering Technique: The best way to water Vanda orchids is to thoroughly soak the roots. You can do this by:
- Submerging: Place the entire basket or pot in a bucket of water for 10-15 minutes.
- Running Water: Hold the plant under a faucet or hose and allow water to run through the roots for several minutes.
- Misting: While misting can help increase humidity, it’s not a substitute for thorough watering.
- Water Quality: Vanda orchids are sensitive to the minerals and chemicals in tap water. It’s best to use rainwater, distilled water, or reverse osmosis (RO) water. If you must use tap water, let it sit out for 24 hours to allow some of the chlorine to dissipate.
- Avoid Overwatering: Overwatering is a common cause of root rot in Vanda orchids. Ensure that the roots have a chance to dry out between waterings.
3. Humidity: Creating a Tropical Oasis
- Ideal Humidity Level: Vanda orchids thrive in high humidity, ideally between 60% and 80%.
- Methods to Increase Humidity:
- Humidity Trays: Place the orchid pot on a tray filled with pebbles and water. Make sure the pot is not sitting directly in the water.
- Humidifiers: Use a cool-mist humidifier to increase the humidity in the growing area.
- Grouping Plants: Grouping plants together can create a microclimate of higher humidity.
- Regular Misting: Mist the leaves and roots regularly, especially in dry climates.
- Monitoring Humidity: Use a hygrometer to monitor the humidity levels in your growing area.
4. Air Circulation: Preventing Stagnation
- Importance: Good air circulation is crucial for preventing fungal and bacterial diseases, which can be a problem in humid environments.
- Methods to Improve Air Circulation:
- Fans: Use a small, oscillating fan to provide gentle air movement around the plants.
- Open Windows: If the weather permits, open windows to allow fresh air to circulate.
- Spacing: Space plants adequately to allow for good airflow between them.
5. Temperature: Maintaining the Right Range
- Ideal Temperature Range: As mentioned earlier, Vanda orchids prefer warm temperatures. Aim for daytime temperatures between 75°F and 85°F (24°C – 29°C) and nighttime temperatures above 60°F (15°C).
- Temperature Fluctuations: While Vandas can tolerate some temperature fluctuations, avoid sudden or extreme changes.
- Seasonal Considerations: In some climates, you may need to provide supplemental heat during the winter months to maintain the ideal temperature range.
6. Fertilizing: Providing Essential Nutrients
- Fertilizer Type: Use a balanced orchid fertilizer, such as a 20-20-20 or 10-10-10 formula.
- Fertilizing Frequency: During the active growing season (spring and summer), fertilize every two weeks. In the fall and winter, reduce fertilizing to once a month.
- Fertilizing Strength: Dilute the fertilizer to half or quarter strength of the recommended dosage on the label. It’s better to under-fertilize than to over-fertilize.
- Application Method: Apply the diluted fertilizer solution to the roots after watering. Avoid getting fertilizer on the leaves, as it can cause burns.
- Flushing: Once a month, flush the potting medium (or roots) with plain water to remove any built-up fertilizer salts.
7. Potting and Media: Choosing the Right Substrate
- Basket Culture: Many Vanda orchids are grown in slatted wooden or plastic baskets without any potting medium. This allows for excellent air circulation around the roots and mimics their epiphytic nature.
- Potting Mix: If you choose to pot your Vanda orchid, use a very coarse, well-draining mix. Common ingredients include:
- Large-grade fir bark
- Coconut husk chunks
- Lava rock
- Charcoal
- Perlite
- Repotting: Repot Vanda orchids when the potting mix has broken down or when the plant has outgrown its container. This is typically done every 2-3 years. Spring is the best time to repot.
Vanda Orchid Propagation: Expanding Your Collection
Vanda orchids can be propagated through several methods:
- Keikis (Plantlets): Keikis are small plantlets that develop from the nodes along the stem of the mother plant. Once a keiki has developed several roots that are at least 2-3 inches long, it can be carefully removed and potted separately.
- Top Cuttings: If your Vanda orchid has become tall and leggy, you can propagate it by taking a top cutting. Make a clean cut below a set of healthy roots, leaving at least three to four leaves on the top cutting. The cutting can then be potted in a suitable medium.
- Division: Mature Vanda orchids can sometimes be divided, but this is less common than with other orchid types. It’s crucial to ensure that each division has a sufficient number of healthy roots and leaves.
Common Vanda Orchid Problems and Solutions
- Root Rot: Caused by overwatering and poor drainage. Symptoms include mushy, brown roots.
- Solution: Remove the affected roots with sterile scissors, repot in a fresh, well-draining medium, and adjust your watering practices.
- Fungal and Bacterial Diseases: Can occur in humid environments with poor air circulation. Symptoms include leaf spots, rot, and wilting.
- Solution: Improve air circulation, remove affected leaves, and treat with an appropriate fungicide or bactericide.
- Pests: Common pests include mealybugs, scale, and spider mites.
- Solution: Inspect your plants regularly and treat infestations with insecticidal soap, neem oil, or other appropriate treatments.
- Lack of Flowering: Can be caused by insufficient light, improper fertilization, or temperature fluctuations.
- Solution: Review the environmental conditions, and amend as neeed.
Popular Vanda Orchid Species and Hybrids
The Vanda genus encompasses a vast array of species and hybrids, offering a stunning diversity of colors, shapes, and sizes. Here are some of the most popular:
- Vanda coerulea (Blue Orchid): Known for its striking blue flowers, a relatively rare color in the orchid world.
- Vanda sanderiana (Waling-Waling): Often called the “Queen of Philippine Orchids,” it’s a large-flowered species with pink and brown blooms. It’s a parent to many popular hybrids.
- Vanda tessellata: Features fragrant, tessellated (checkerboard-patterned) flowers in shades of brown, yellow, and green.
- Vanda tricolor: As the name suggests, this species boasts three-colored flowers, typically white, yellow, and purple.
- Ascocenda Hybrids: These are intergeneric hybrids between Vanda and Ascocentrum. They tend to be more compact than pure Vanda species and are known for their vibrant colors.
Vanda Orchid Displays and Arrangements Because of their growing habit, Vanda Orchids are a perfect choice for hanging baskets, where their roots are allowed to hang free.
Leave a Reply